Validate your VIROO Application
To build your VIROO Application, all the Unity scenes that make up the Application must be validated by the VIROO validation system. For this you can open the Project Validation window going to Window -> Viroo -> Dashboard and then navigating to the Project Validation tab.
It's recommended that, before building a VIROO Application, the Project Validation window be opened to make sure that all project settings and Unity scene components are correctly setup. This will help to identify possible errors in a preventive way.
This must be done for each Unity scene that forms your VIROO Application.
Some errors can be corrected automatically by clicking the Fix button. When this isn't possible, the error message explains how to correct the issue.
The validation checks are performed only when the window is focused. If you check Always refresh toggle, the checks will be performed even if the window isn't focused. This may reduce the performance of the Unity Editor, as some rules check the whole active scene's hierarchy.
By default, only the checks that return either a Warning or Error result are shown in the list. If the Show all toggle is checked, all the validations will be shown, even the ones that pass correctly.
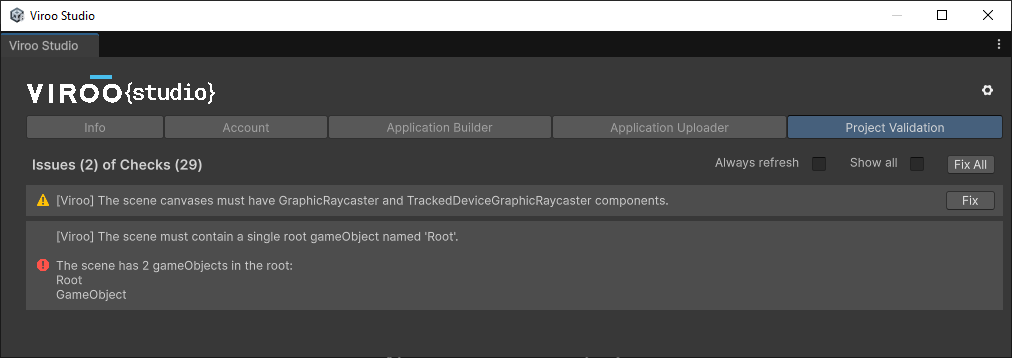
After there are no issues in this Project Validation tab, go to the next section, Build your VIROO Application, to see how you can validate your VIROO Studio project.