VIROO Studio Toolbar
The VIROO Studio package now includes a Unity Overlay to offer shortcuts for scene element creation.
The aim of the toolbar is to provide configured prefabs for common VIROO interaction elements. Since some of this prefabs include interaction with 3D elements, they include a 3D cube as a placeholder for the 3D element that you may replace later.

As other toolbars, it's only available in the Scene View and it can be docked anywhere inside this view.
You can toggle the button with the VIROO logo in Unity's Overlay Menu toolbar to change the VIROO Studio toolbar's visibility.
Categories
The toolbar contains the following shortcut categories:
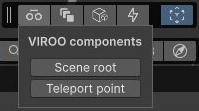
- VIROO Components
This category includes core VIROO elements that you may include in your scene.
In the current version of the toolbar, it includes the following options:
- XR Interaction Toolkit Components
This category includes prefab with the configuration for the most common XR interactions. For more information check Viroo Interaction System.
In the current version of the toolbar, it includes the following options:

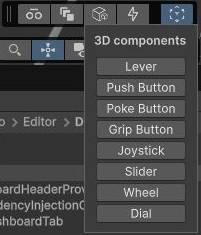
- 3D Components
This category includes configured interactions that include the corresponding 3D element.
In the current version of the toolbar, it includes the following options:
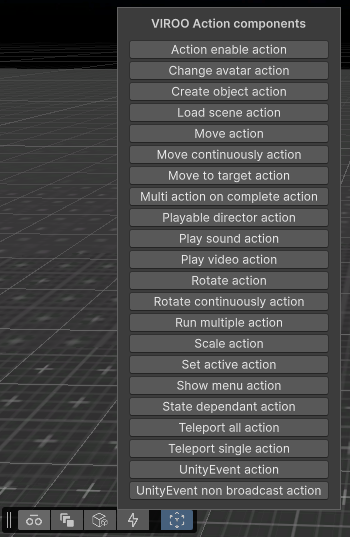
- VIROO Action Components
This category includes Actions from the VIROO interaction system. For more information check Viroo Interaction System.
In the current version of the toolbar, it includes the following options:
- Toggle arena gizmos
Additionally, the last button in the toolbar toggles the visibility of the arena gizmos in the scene View.
If there is no arena file configured in Viroo's settings in Project Settings, this button will appear disabled.
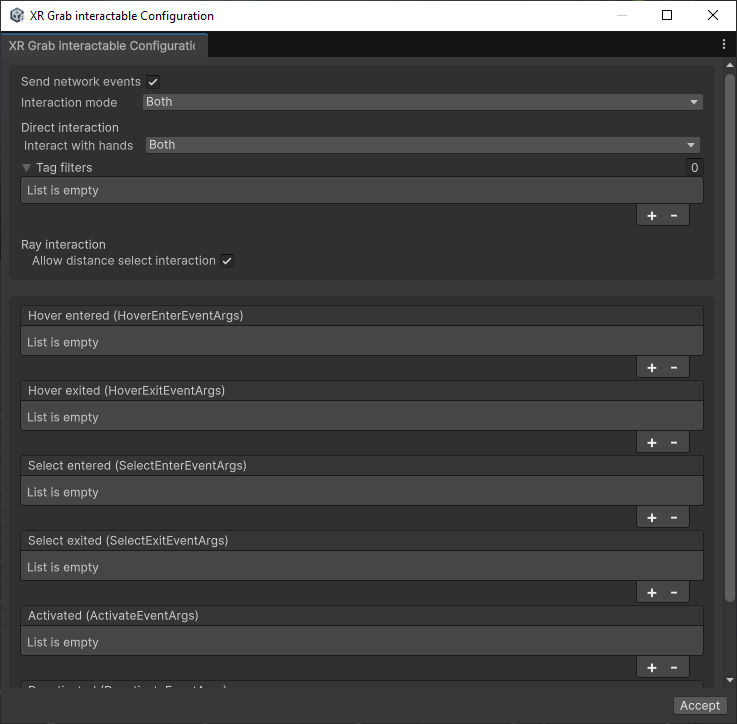
Element configuration
Since each element prefab may include more than one MonoBehaviour for its correct functioning, it may be cumbersome to find the attributes you want to set for your use case. For this reason, when creating some of this elements, a dialog will be displayed. In this dialog you may configure the main attributes related to the behaviour of the element before instancing it in the scene.
In the following example, you can see how a XR Grab interactable can be configured before creating it.