Project configuration
This article reviews key VIROO configuration settings relevant to your project.
VIROO settings
You can configure settings related to the VIROO Studio package at Edit -> Project Settings -> Viroo.
Application Settings
| Field | Description |
|---|---|
| Application Identifier | Used in the VIROO platform to identify the VIROO Application unequivocally. This field is mandatory. |
The Application Identifier field can be set from the VIROO Dashboard. To learn more, please visit Build your VIROO Application.
Arena Scene view Settings
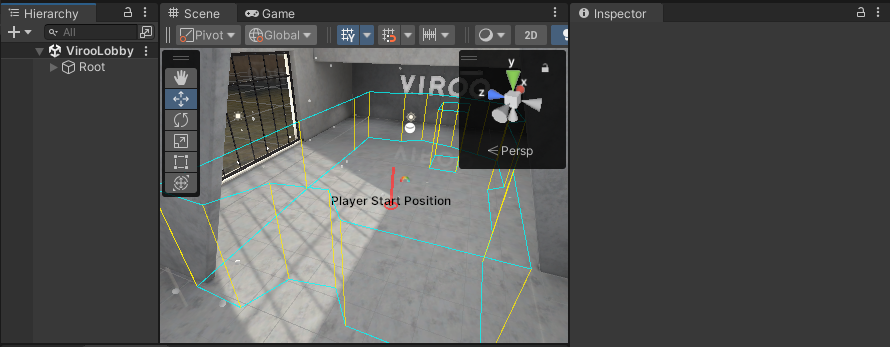
The settings in this section are related to VIROO rooms. Setting these, VIROO Studio displays a boundary that reflects the size of a specific VIROO room inside the Unity Editor.
To enable this functionality, an Arena file is required. This file contains the definition of a VIROO room, including information about its positioning and dimensions.
| Field | Description |
|---|---|
| Arena color | The color used to draw the perimeter of the VIROO room. |
| Arena wall color | The color used to draw the walls of the VIROO room. |
| Arena file | The arena file of the VIROO room. Click on Open arena file to replace it. |
The Arena visibility can be enabled or disabled from the VIROO Toolbar. For more information, please visit VIROO Studio Toolbar.

Note
If you need an Arena file for a VIROO room and are unsure how to get it, please contact the support team through VIROO VirtualDesk or via email at support@virtualwareco.com.
Application builder
You can configure settings related to the VIROO Application Builder at Edit -> Project Settings -> Viroo -> Application Builder.
| Field | Description |
|---|---|
| Compress | This setting compresses the application into a Zip file after the build process is complete. It's recommended to keep this option enabled. |
Play mode
You can configure settings related to the VIROO Studio Play mode at Edit -> Project Settings -> Viroo -> Play mode.
The settings listed in this window only affect when playing a VIROO Scene in Play mode, in the Unity Editor.
| Field | Description |
|---|---|
| Is Enabled | This setting enables you to test VIROO Scenes individually. It must be selected to enter Play mode from any VIROO Scene. |
| Is Room Player | If checked, entering Play mode in any VIROO Scene will simulate the behavior you get in VR rooms. For example, for the starting position RoomCenterStart will be used instead of PlayerStart. |
| Is VR enabled | If selected, when entering Play mode in the editor, it will start in VR mode, otherwise in Desktop mode (with mouse and keyboard). |
| Is Hand Tracker enabled | If selected, hand tracking in VR is enabled. Only available if Is VR enabled is also selected. |
| Show Player In Hierarchy | If selected, the necessary VIROO components for running the scene in Play mode within the Unity Editor will be visible in the hierarchy. If not selected, these GameObjects will remain hidden. |
| Show Mock UI On Editor | If selected, the application side menu interface will appear. It's a mock of the one displayed when the VIROO Application is running on a VIROO Player in Desktop mode. |
| Enable Gaze Interaction | If selected, gaze interaction in VR is enabled. Only available if Is VR enabled is also selected. |
| Locale | This is the default language used when entering Play mode in the Unity Editor. When launching the application from a VIROO Player, the language is determined by the user's settings. |
Project validation
You can access Project Validating window through Window -> Viroo -> Dashboard. Please go to Validate your VIROO Application for more information.